UA-45749527-1

Labels

Showing posts with label Italian Bikes. Show all posts

Sunday, May 3, 2015

Ducati 749 15K Service

The air filters in the 749/999, by the nature of their design and that of the airbox, do not have a whole lot of surface area and tend to plug fairly quickly.  The only option is frequent service which, although a bit of a hassle, isn't very costly since the factory air filters in these models are cleanable and reusable.  Don't bother buying ANY aftermarket units for this model since you will only be buying what you already have, an oiled gauze filter element.

These filters had just about 15K miles of mixed road and trackday use.


This same bike also had some seriously excessive clearance on a couple of closer rockers.   The factory specified clearance for a Testastretta is .002"-.010", with .002" being the preferred clearance.
Here we see .014" and .016" clearances.

If you own a Ducati Superbike and ride it the way it was made to be ridden, then scheduled service is a necessity, not an option.

Friday, April 10, 2015

Monster S4R Major Service

Here's a really fun combination from the rider's viewpoint, the Desmoquattro engine in a Monster chassis.  From a service standpoint, it's not so much fun.  While the Monster lacks bodywork to deal with, it more than makes up for that fact by having every electrical component tightly packed around the engine and inside the frame.  In a Superbike chassis these items are readily accessible (and removable) once the fairings are removed. 


Thursday, April 9, 2015

ST3S Major Service

Here's an ST3 that's in for its 15K service.  The bike was recently bought by its current owner but it had no service records.  It's a 2006 model so it has the quiet, long-lived wet clutch in place of the damnable, noisy dry unit that "Ducatisti" are so fond of hearing.  Personally, I prefer that a bike not sound like it's self-destructing, but that's just me.  It's also an "S" model so it gets the (OEM) Öhlins shock along with ABS.  I think that the ST2 and 3 were the best bikes that Ducati ever built and can't fathom Ducati's decision to discontinue the line.  There are a couple of other things about this particular bike that I also can't fathom which I will detail presently.

Stripping the bodywork to access the engine....

Apparently, putting a dab of anti-seize on the fairing fasteners just takes too much time for the average flat-rate wrench-monkey, so we end up with fairing screws rusted to the wellnut inserts.
They either don't come out at all...
...or they tear the insert
Obviously the wellnuts will all be replaced and the fairing screws will be lubed to prevent this in the future.

Then I lifted the tank and found this.  A fine example of "tuning" using the advice of internet "knowledge" and a healthy dose of mechanical incompetence.

If you're thinking that having the air filter loosely held in place with wire would allow dirty, unfiltered air to enter past the filter, you would be correct.
The internet forum experts continue to have no idea as to the actual function of the airbox in a modern motorcycle.  This isn't some old POS American car in which the air cleaner housing can be removed for "free horsepower".  The airbox of a modern bike is an integral part of the bike's intake system.  Its volume and rigidity are engineered to produce a resonance that boosts intake pressure at a certain RPM.  Removing the lid destroys that, as does removing the snorkels (which actually convert the incoming air's velocity into pressure) or cutting holes into the lid.  Unless you've got a degree in fluid dynamics and can understand airflow behavior in an IC engine, DON'T assume that you can successfully second-guess the engineers that designed your bike (I'll save you the suspense, you can't).

As has been known forever, K&N filters DO flow more air than stock paper filters.  How do you think they do that?  It's no secret that the more open mesh that allows more airflow also provides LESS FILTRATION.  Again, in the case of a modern bike, the OEM filter is not a restriction.  The paper filter has much more surface area than a gauze filter (that's why it's pleated, cut one out and flatten it, you'll see just how big it really is) and it actually stops the dirt particulates that turn into grinding compound in your engine.

This is what was inside one of the intake trumpets...

Ducati did not leave you any "free horsepower" to be discovered by butchering your airbox or installing a less efficient filter.  You are MUCH more likely to find a bit more power by correcting the factory's cam-timing errors than anything else.

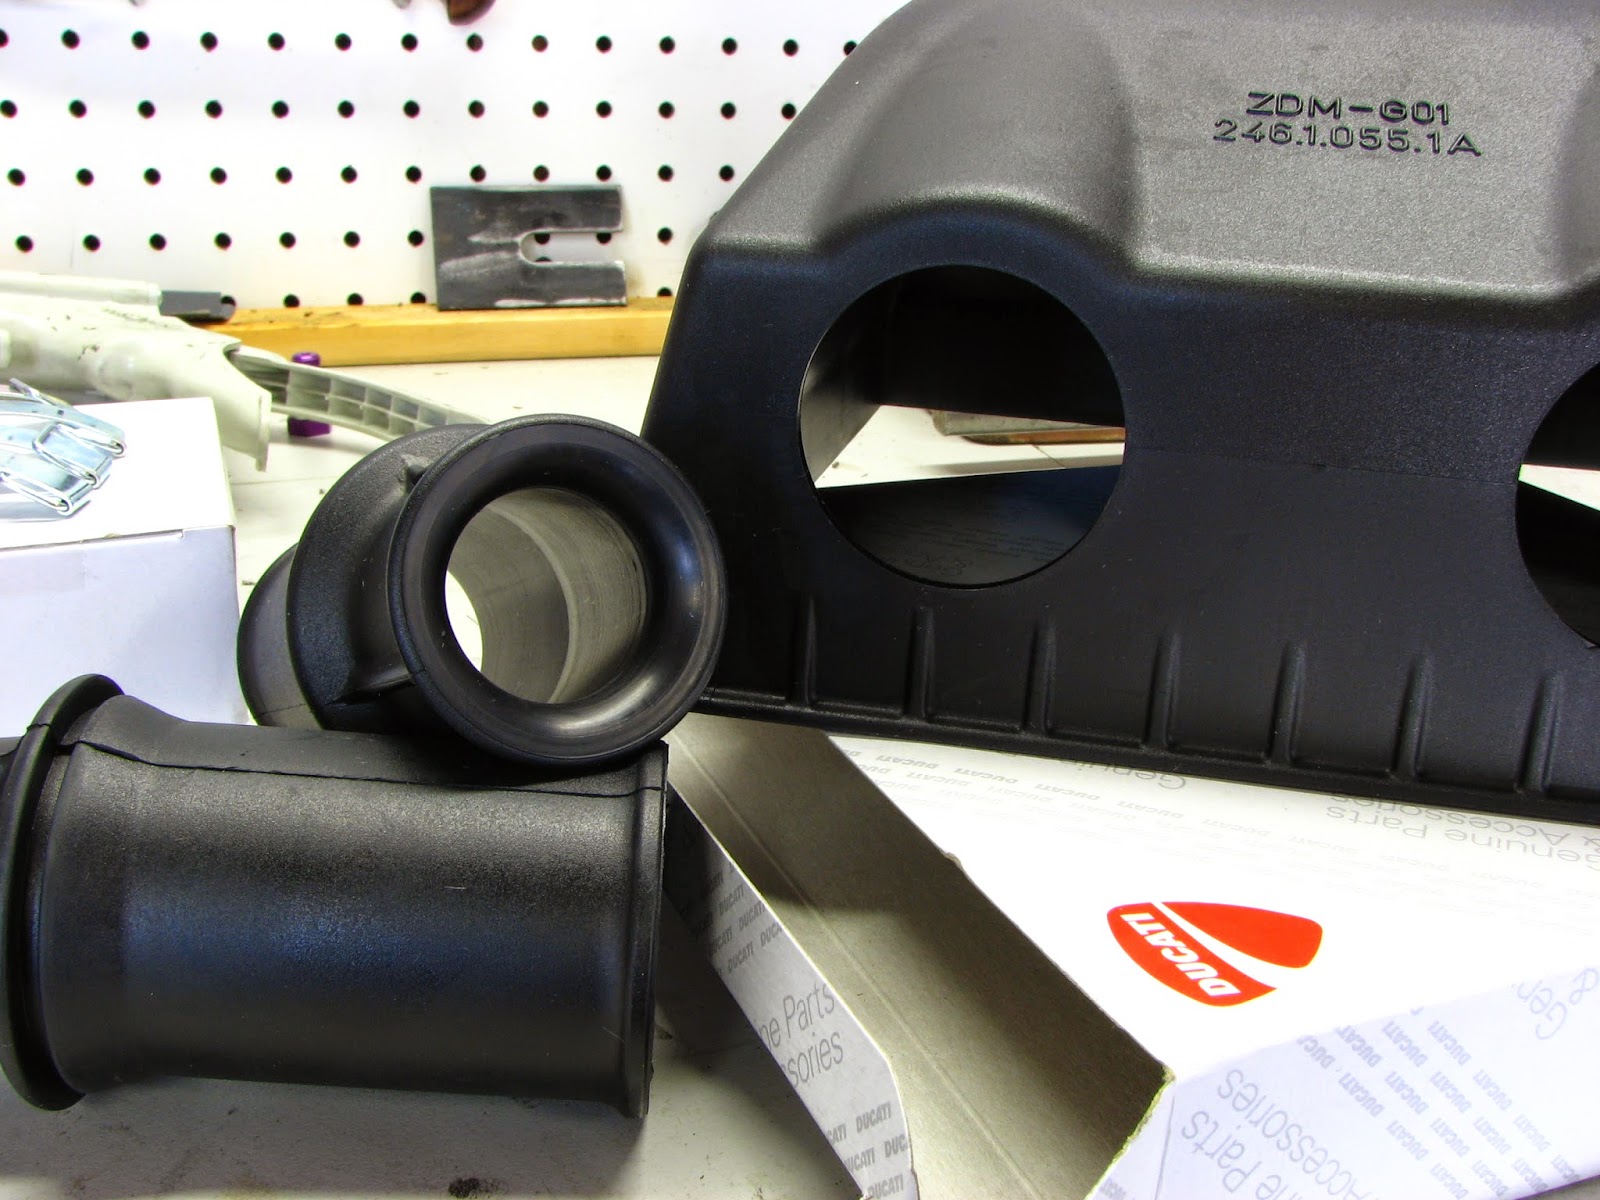
Here are the new airbox lid and intake snorkels, fresh from Italy.  Notice the inside diameter of the intake snorkel compared to the size of the hole in the lid.  If you think that the airbox will flow more air with the snorkels removed, you'd be wrong.  Airflow does not like sharp edges.  Notice the radius at the inlet side, this smoothly guides the incoming air into the even narrower throat, thus causing an increase in flow velocity, just like Mr. Bernoulli discovered it would.

It's at the outlet side of the snorkel that the air's velocity is converted into pressure, just as Mr. Venturi discovered.  The outlet side is a gradual taper outward.  This is known as a diffuser (not a de-fuser, that's somebody who works on the bomb-squad) and is designed to convert the velocity of the air in the venturi back into pressure with minimal energy loss.

Here is a comparison of the stock versus the K&N (crap) air filter elements.  Notice how the paper air filter has many more pleats.  This equals more surface area.  Imagine pulling both filters out flat and you'll get an idea of just how much more.  The stock air filter is not a restriction, it's surface area is calculated to provide sufficient air flow for the engine while maintaining better than adequate filtration.  As I stated earlier, the K&N will flow more air, BUT will do so at the expense of filtration efficiency, and an otherwise stock engine has no need of more airflow.


Apparently, the valve clearances had never been serviced as they were ALL out of spec on both the openers and closers.  Both exhaust valves had ZERO clearance on the openers.  This is a dangerous condition since the exhaust valve depends upon full seat contact for not only sealing but more importantly, for heat transfer from the hot valve to the cylinder head where the coolant can carry the heat away.

Since any job that's worth doing is worth doing right, I always take the time to set the closer clearance to .001" to .002" on every Duc that comes into the shop for service.  I also set the opener clearance to minimum end of the factory specification.  This makes for a quiet valvetrain that does not depend upon the helper springs to close the valves at idle.  Sometimes, in order to set the clearances with such precision the shims must be ground by hand to the proper size.  On this job two closers and two openers had to be custom fit.  I usually use a #2 cut file to get them close and hand lap to finish.  Here is the setup for hand lapping the shims.  It is a steel master flat surface plate with a thin coat of oil to hold the paper in place.  The paper is lubricated with a couple drops of oil to create a slurry and it leaves a perfect finish on the face of the shim.

Here is the rear exhaust shim stack in place.  Removing the cam bearing block and the opener rockers makes the job much easier than simply sliding the rockers to the side and doesn't take much more time.

With the valve clearances corrected and the new timing belts installed and correctly tensioned it's time to hook up the computer and test all electrical components relating to the engine (injectors, cooling fan, etc.), check for trouble codes, set the TPS and clear the service reminder.

With the engine warmed up the final operation is to change the engine oil and filter and check and clean the pickup screen.  The pickup screen should never be neglected since it is the oil pump's first defense against particles that could damage it.  This screen looked good but that cheap-o oil filter is a bad choice.  OEM filters and Mobil-1 oil are the only items that I will use.  The filter is pre-filled before installation.  This greatly reduces the time that it takes the oil to reach the valvetrain after start up.  As standard practice I safety the new filter with a hose clamp on all Ducati service.


Finally, the bike is detail washed, the bodywork is reinstalled and the bike is ready for another 15 thousand miles of trouble-free riding.




Friday, February 20, 2015

Desmoquattro Valvetrain Condition at 20K

Here we have the pinnacle of race engine cylinder head technology, circa 1955.
Physically huge, large included valve angle (for a 4-valve), obsolescent desmo valve drive, ball-bearing supported cams, it's all there.
Actually it's a cylinder head from a 2005 Ducati ST-4 with roughly 20 thousand on the clock (although that doesn't make the above statement any less true).

The valvetrain geometry of the Desmoquattro forces tremendous side loads on the valve stems during the opening sequence.  As one might expect, this is a very tough environment for valve guides and stems.  In a race engine that is serviced as often as it's ridden this isn't really an issue since race engines are expected to have a short lifespan.  This is precisely why using this engine in a road bike isn't the best idea and using it in a touring application is patently absurd.  Make no mistake, the Desmoquattro is a race engine, designed in the 80s to win WSBK races.

In the following photos and video you will see the effects of mileage upon this design.  Keep in mind that although 20K isn't a lot of miles on a street engine, it is multiple lifetimes for a racebike-derived engine.

Testastretta engines are far more tolerant of street use precisely because their valvetrain geometry imposes far less side-loading on the stems due to their narrower included angle and much-improved rocker arm geometry.

It isn't just the valveguides that suffer.  Here are the closer shafts and springs.  Note how the closer springs have worn notches into the shafts.  Also note the wear to the spring wire itself.  This wear is exactly where the springs will fail.  The notches in the shafts are also stress raisers and will result in cracking and failure of the shaft at some point.

In this video the amount of valve guide wear is evident.

Since this is an obsolete engine, there is no aftermarket support except for shims and exchange rocker arms to correct the notorious chrome flaking.  This means that one either has valves custom made or you pony up the 150-200 dollars PER VALVE for OEM.
Buyer beware.

Friday, August 22, 2014

Multistradas and dirt...

I'm not going to get into whether the MTS1200 is a real "ADV" bike or not.  Each owner will use it as they see fit.  I would like to address a couple of points that should be given some thought if you do use your bike off-road.

First are the timing belt covers.  Ducati actually puts a foam filter in the front belt cover, apparently to prevent dirt ingress.

This is a sensible approach since dirt or other debris in the timing belts can never be considered a good thing.  Unfortunately the effort is for nothing because the rear belt covers do not even meet.
Take a look at the gap between the upper and lower halves of the rear belt cover.  So much for that idea.

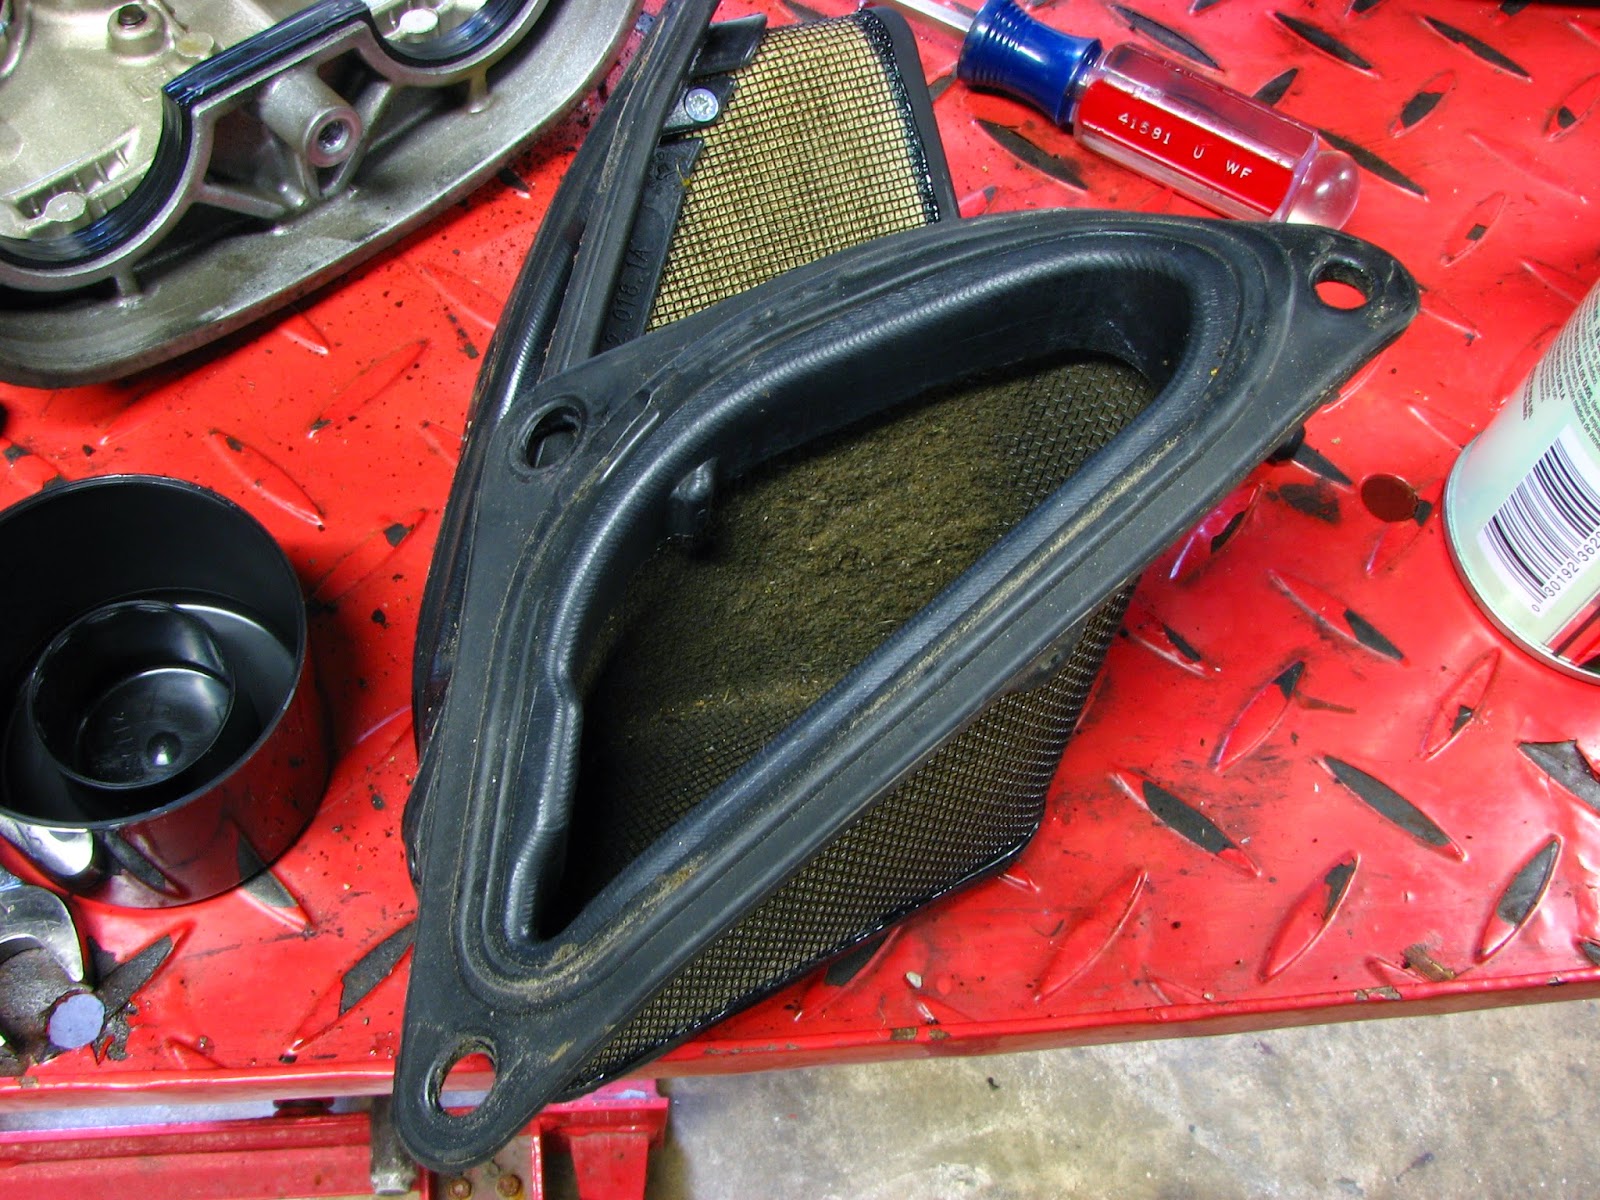
Next up is a lesson in how not to design an airbox.  The air filter is a trapezoidal tube, open at each end.  It is constructed of pleated paper and has rubber gasket ends.  The left end sits up against the inside of the airbox and the right end is captured by the airbox snorkel.  The seal at both ends depends solely upon the compression of the rubber seals.  Here is where the problem arises, what do you think happens when that filter retainer is tightened down upon the PAPER filter.  Well, what happens is that the entire filter compresses thereby allowing leakage past the end seals.  Here are some photos of the "clean" side of the airbox.

In the second photo you will notice a few things.  First is that there is no register or shoulder to positively locate the filter element.  Second is the paths of dirt that have leaked past the filter seal.  Third is the homemade "improvement" via a soldering iron.  This is apparently a popular modification on internet forums, along with removing the external air supply to the airbox.  While I've not flowbench tested a modified vs. stock MTS 1200 airbox, I'm pretty sure that that sharp-edged ragged hole has succeeded in nothing beyond destroying the airbox's rigidity and therefore its designed-in resonance.  Removing the duct that channels cool outside air to the airbox certainly is not a way to increased airflow since the now cut-off snorkel is sharp-edged, and airflow does not like sharp edges.  But who am I to argue with internet experts.
I have compared a number of popular "free HP" airbox modifications for other bikes that are popular on the net.  Rarely do they work as touted.  One example is removing the rubber inlet snorkel from the airbox on the Aprilia Caponord.  This results in a sizeable DECREASE in airflow due to the fact that the airflow is encountering a sharp-edged hole and becoming choked by turbulence.  Many armchair horsepower junkies believe that airflow behaves intuitively, IT DOES NOT.  Unless studying airflow is your hobby and you have pretty good grasp on fluid dynamics and the effects of Helmholtz resonance, you should probably rethink cutting, drilling, sawing or otherwise mutilating your airbox.


Thursday, August 14, 2014

Multistrada 1200 Major Service

This MTS1200 is in for its 30k service, belts, valve adjustment, etc.  Once you excavate your way to the engine the service procedure is the same as for any Testastretta so I won't go into exhaustive detail regarding those items that are common to all 4V Ducatis.  There are a few items that I will point out, some that are unique to the Multistrada.


First is the sheer number of fasteners that must be removed to facilitate servicing.
Second is the cramped quarters while servicing the rear cylinder head.  This area is much more accessible in the Superbike chassis.

On the other hand, the MTS chassis does offer much more room to work on the front cylinder thanks to the taller suspension and the high-mounted oil-cooler.

Here is some advice for those owners who like to change their own oil and filters.  If you install the drainplug so tightly that this happens when removing it, then you're overtightening it.  Buy a good torque wrench and use it.  The same rule applies to the filter, if it takes an extension on the filter wrench (it did) and collapsing the filter body (also, yes) to loosen the filter, then you overtightened it.
If you're paranoid about losing an oil filter, then simply put an ordinary hose clamp on the filter body and orient it so that it prevents the filter from unscrewing.  Do NOT use one of those aftermarket billet filter clamps.  Their design does not allow for uniform clamping pressure around the filter body.  They will actually crush the body AND be loose at the same time.  Just use a hose clamp.


Now let's talk about an aftermarket item that actually does what it says it will do.  Whether or not this is actually beneficial is another story.  FatDuc O2 sensor signal manipulators intercept the oxygen sensors' signal and send a modified signal to the ECU, causing the bike to run richer than stock in the closed-loop portion of the mapping.
As can be seen by looking at these plugs, the fueling is quite rich.


Saturday, July 19, 2014

An expensive lesson

European (and especially Italian) motorcycles are much like a high-maintenance girlfriend, they don't tolerate neglect and if you're foolhardy enough to neglect her needs she WILL make you pay.
In all seriousness, European motorcycles are very expensive to own and maintain, with Ducati and BMW heading the list.  Many prospective and first-time Ducati owners are shocked to realize that they will be facing maintenance costs of 600-1200 dollars (depending upon exactly what is needed and who does the work) EVERY 6500-7500 miles. This maintenance simply can not be deferred as these bikes will not suffer neglect the way that some other bikes can.  It is simply the cost of owning an exotic vehicle and something to keep in mind if you're contemplating the purchase of a bike like this.

Here we have a 2003 Ducati 999 Monoposto, looking very seductive in her bright yellow dress and carbon fibre jewelry.  Hot, yes?  It has 13,000 miles and is due for its second major service.  Apparently the starter clutch started playing up and rather than getting it taken care of immediately, the owner put it off until the sprag failed completely.  The extent of the damage is detailed below.


Here is the alternator cover ready to be removed.

Once the flywheel was removed, here is what was found.

After cleaning everything, the full extent of the damage becomes apparent as the gear and the outer race are also destroyed.

Here is the new starter gear, compare to the failed gear in the second photo.  Yes, much of the metal that used to be that gear ended up in the oil.

Here is the new sprag and flange ready to be assembled to the flywheel.

Here I will show just how easy it is to screw things up if you aren't careful during assembly of the flywheel/sprag/gear assembly.  In these photos only the bearing and spacer are shown for clarity.
There is a thrust washer that goes between the crankshaft timing gear and the starter gear.  The inner bearing collar MUST pass THROUGH the thrust washer when assembled, as shown in this photo.

When it is correctly assembled on the crankshaft, it will look like this.

If the thrust washer slips off during assembly, this is what will happen.  Note that the washer is off-center and is trapped between the bearing collar and the crank gear.  If the flywheel nut is tightened with this condition present the thrust washer WILL FRACTURE and also relieve the torque on the flywheel nut, causing much damage.

The correct way to reassemble the assembly is this, use some grease to hold the thrust washer in place and rotate the starter idler gear while sliding the assembly onto the crankshaft splines.

Speaking of splines, you can't just slap the flywheel onto the crank any old way.  The oil hole in the flywheel must be aligned with the large groove in the crank.


The last step before closing up is to reinstall the alternator rotor.  Contrary to what the manual says, the rotor bolts must be replaced.  The updated bolts are class 10.9 whereas the old-style bolts are class 8.8.  There is a considerable difference in strength.  They also should be thoroughly degreased and Loctited and torqued to proper spec.  I assemble the rotor to the flywheel with the flywheel installed because it's easier than doing it on the bench.  The stock flywheel nut is only temporarily holding the flywheel.  The final assembly is with Nichols double nuts, Loctited and torqued to 140 lb. ft.

 I will not go into replacing the belts, etc in this post as that procedure has been detailed elsewhere in this blog.

One final note: 
There is a lot of talk on forums about shortening the sprag spring or replacing it with the spring from some seal or other, in order to prolong the life of the sprag.  This is nothing less than butchery.  If you can't afford the parts, maybe you shouldn't own a Ducati.  If you take the bike down this far and don't do the job right, maybe you shouldn't own tools.